gY Tool is the front-end name for your local YaraScanTUI setup — a clean, fast terminal UI that lets you take the YARA rules published on this site and use them locally with almost zero setup. Install Python → run the launcher → drop rules in a folder → start scanning. That’s it.
This page covers:
- Where to get the tool
- How to clone or download it
- What the launchers do behind the scenes
- How to use ghostYara rules with the tool
- How to start scanning files or folders immediately
1. Where to get YaraScanTUI
YaraScanTUI now lives in its own dedicated repo:
- Repo: https://github.com/Sab0x1D/YaraScanTUI
- Direct ZIP download: https://github.com/Sab0x1D/YaraScanTUI/archive/refs/heads/main.zip
You can either clone the repo or grab the ZIP.
Option A — Clone via git (recommended)
git clone https://github.com/Sab0x1D/YaraScanTUI.git
cd YaraScanTUI
Option B — Download as ZIP
- Visit: https://github.com/Sab0x1D/YaraScanTUI
- Click Code → Download ZIP or use the direct link above
- Extract
- Open the extracted
YaraScanTUIfolder
Once inside that folder, everything else is automatic.
2. Requirements
Very minimal:
- Windows 10/11, macOS, or Linux
- Python 3.10+ https://www.python.org/downloads/
- Internet (for dependency install)
You do not manually create venvs or run pip. The run scripts do all setup automatically.
3. Folder structure
YaraScanTUI/
├── add-python-to-path.bat               # <-- run right after your Python installation (run as admin)
├── add-python-to-path.ps1
├── app/
│   ├── controllers/
│   │   ├── __init__.py
│   │   └── scan.py
│   ├── services/
│   │   ├── __init__.py
│   │   ├── export.py
│   │   ├── rules.py
│   │   ├── scanner.py
│   │   └── staging.py
│   └── views/
│       ├── __init__.py
│       ├── file_info.py
│       ├── log.py
│       ├── matches.py
│       ├── rule_editor.py
│       └── ruleset.py
├── pyproject.toml
├── README.md
├── requirements.txt
├── run.bat               # <-- tool start
├── run.ps1
├── run.sh
├── scan_tui.py
├── settings.yaml
├── workspace/
│   ├── reports/
│   └── samples/
├── yara_rules/               # <-- your .yar/.yara files go here (flat folder)
│   └── gotoRat.yar
└── yara_scan_core/
    ├── __init__.py
    ├── models.py
    └── state.py

10 directories, 27 files
Important
yara_rules/ must remain a flat folder. No subdirectories.
Drop .yar / .yara files directly inside it.
If you want to group families, use filename prefixes such as:
stealer_Formbook.yar
loader_DarkGate.yar
banker_Mispadu.yar
4. Installation & first run
Windows
- Install Python 3.10+
- Make sure Add Python to PATH is enabled
- If not, run
add-python-to-path.bat
- Run the tool:
- Double-click
run.bat, or - Right-click
run.ps1→ Run with PowerShell
- Double-click
What the launcher does:
- Detects Python
- Creates
.venvif missing - Installs dependencies
- Launches YaraScanTUI
Next runs are instant unless requirements.txt changes.
macOS / Linux
- Install Python 3.10+ (macOS example:
brew install python) - Open terminal and run:
cd /path/to/YaraScanTUI
chmod +x run.sh   # one-time
./run.sh
Same behaviour as Windows — automated venv setup and launch.
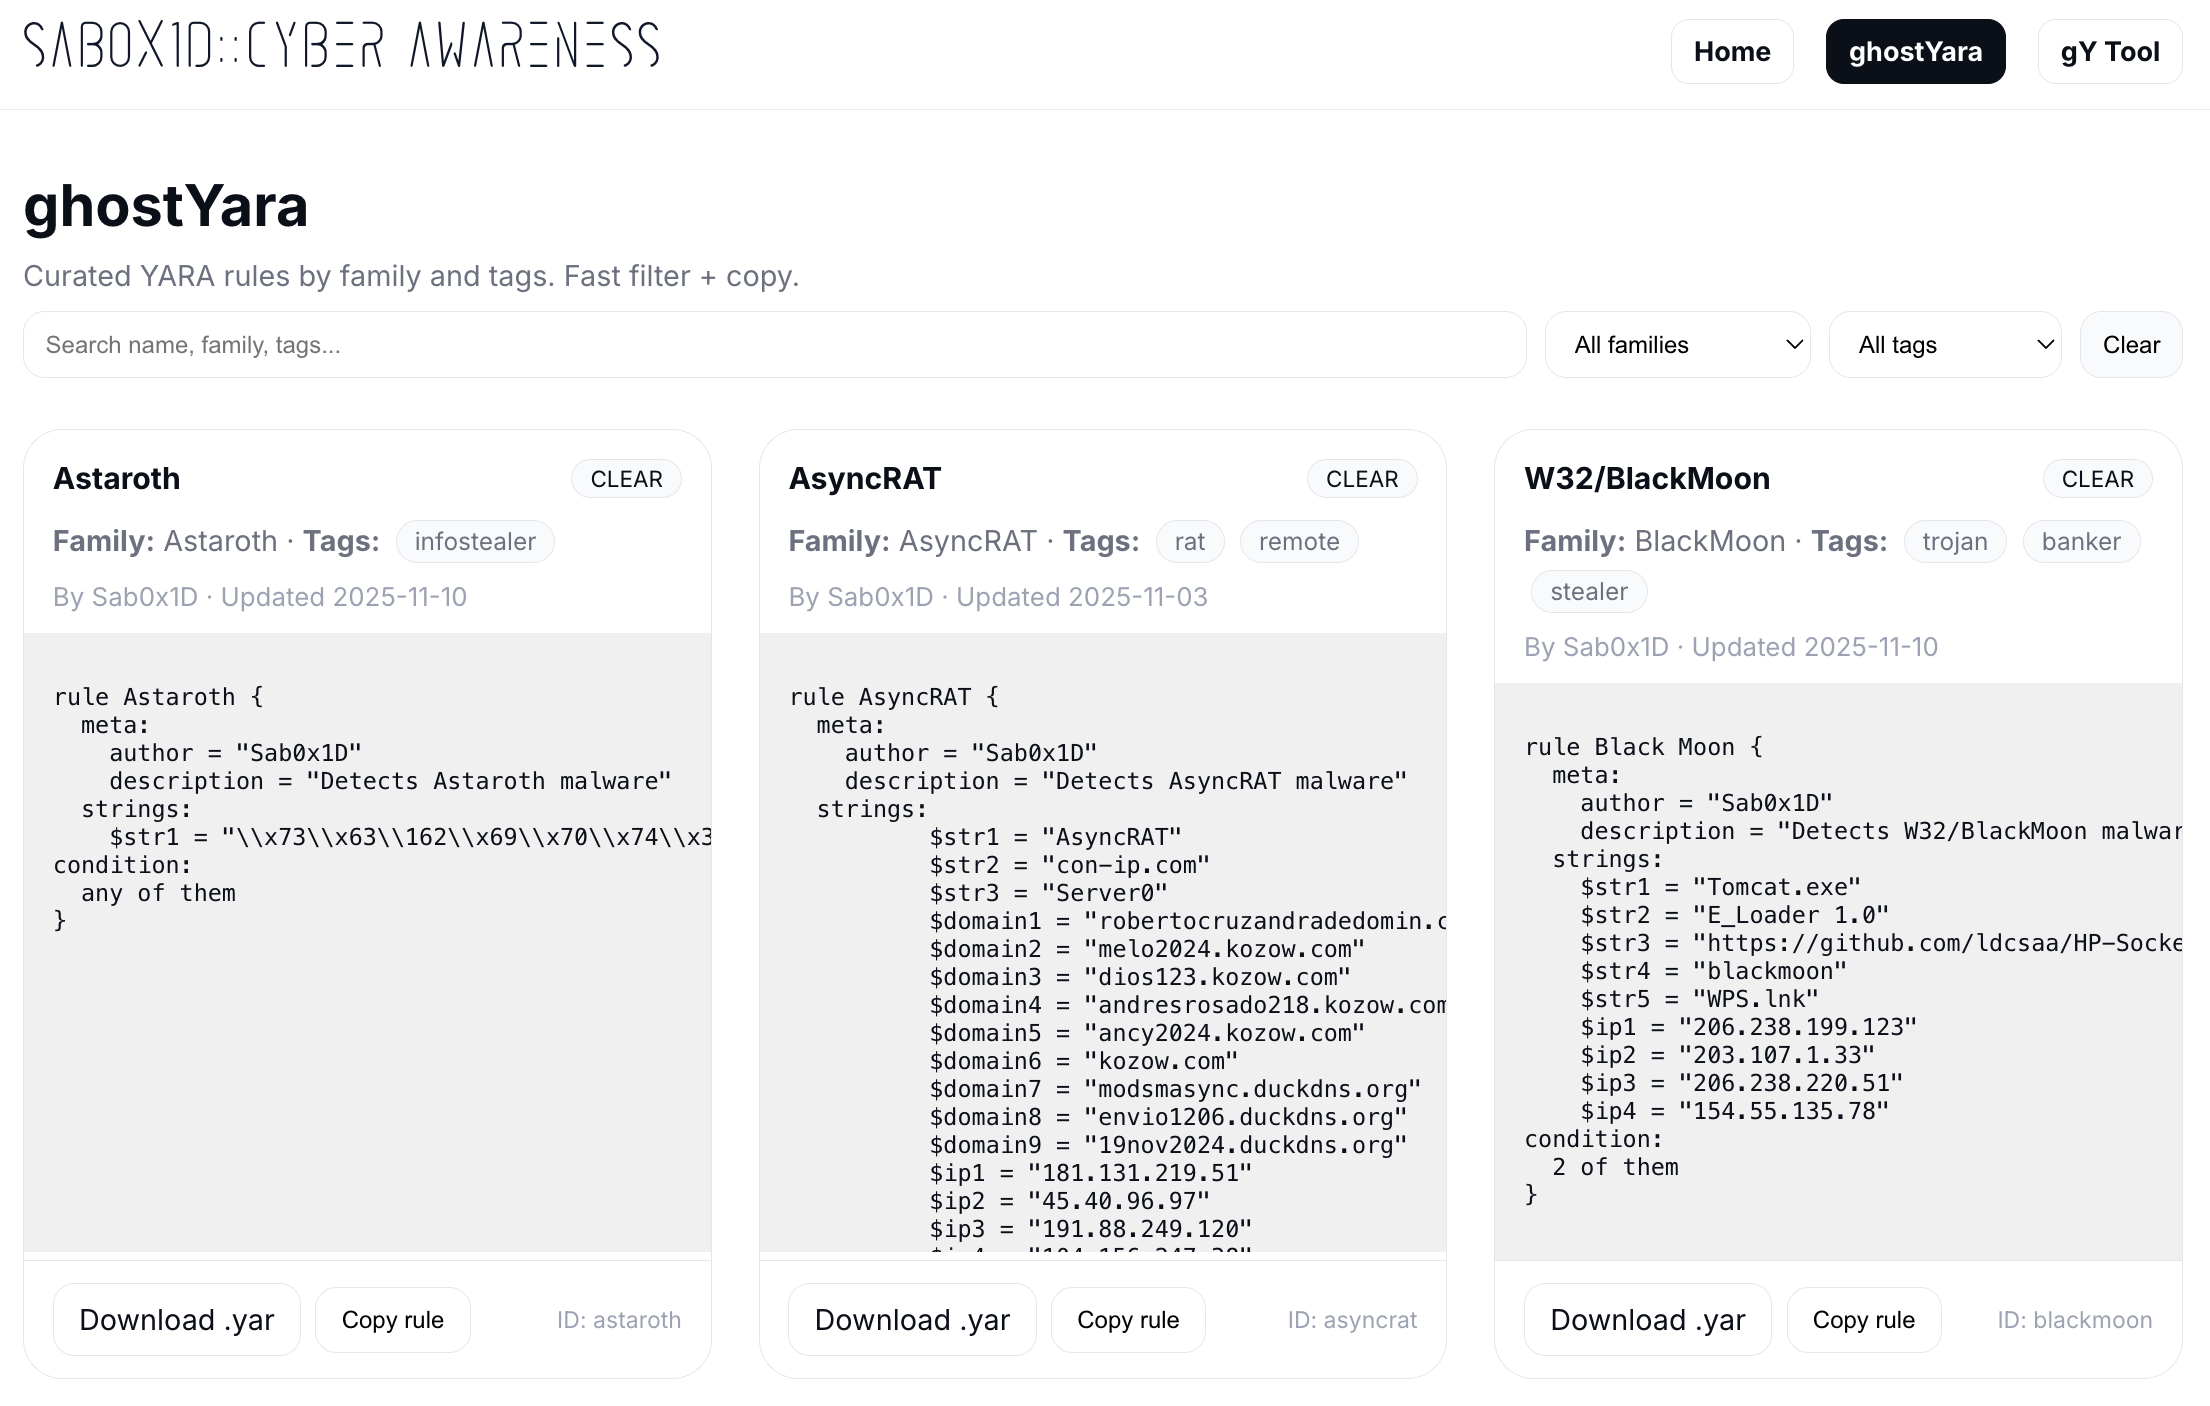
5. Adding ghostYara rules
This is where gY Tool becomes useful.
- Go to the ghostYara section on this site.
- Use Download .yar OR copy/paste into a new
.yarfile. - Save rules directly into your local
yara_rules/folder:
yara_rules/
├── Formbook_ElasticSecurity.yar
├── Mispadu_Banking_Trojan.yar
└── DarkGate_Loader.yar
- Re-run
run.bat,run.ps1, orrun.sh. - Scan your samples and confirm hits.
6. Example lab workflow
- Clone the repo:
git clone https://github.com/Sab0x1D/YaraScanTUI.git
cd YaraScanTUI
- Launch once to let it set itself up.
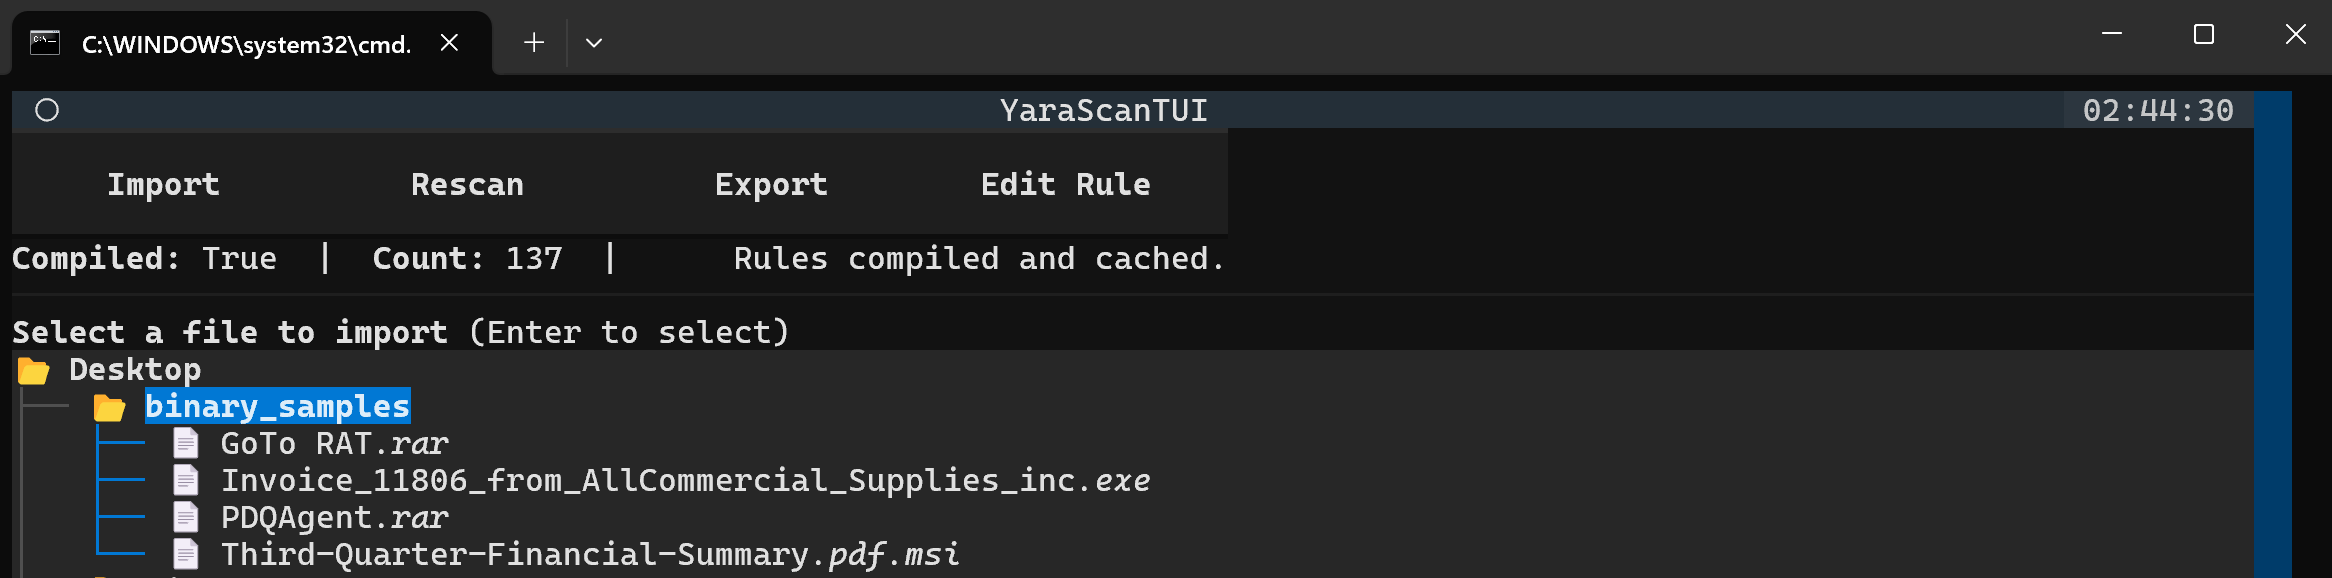
- Drop samples into
workspace/(any structure you prefer). - Drop rules from ghostYara into
/yara_rules/(flat folder). - Scan via TUI — single file or whole folder.
- Review hits, tune rules, rescan until satisfied.
- Once a binary file is imported into the tool, a sample copy is placed within the
workspace/samples/folder. When finished, you will have to manually delete the sample, unless you are wanting to keep it.
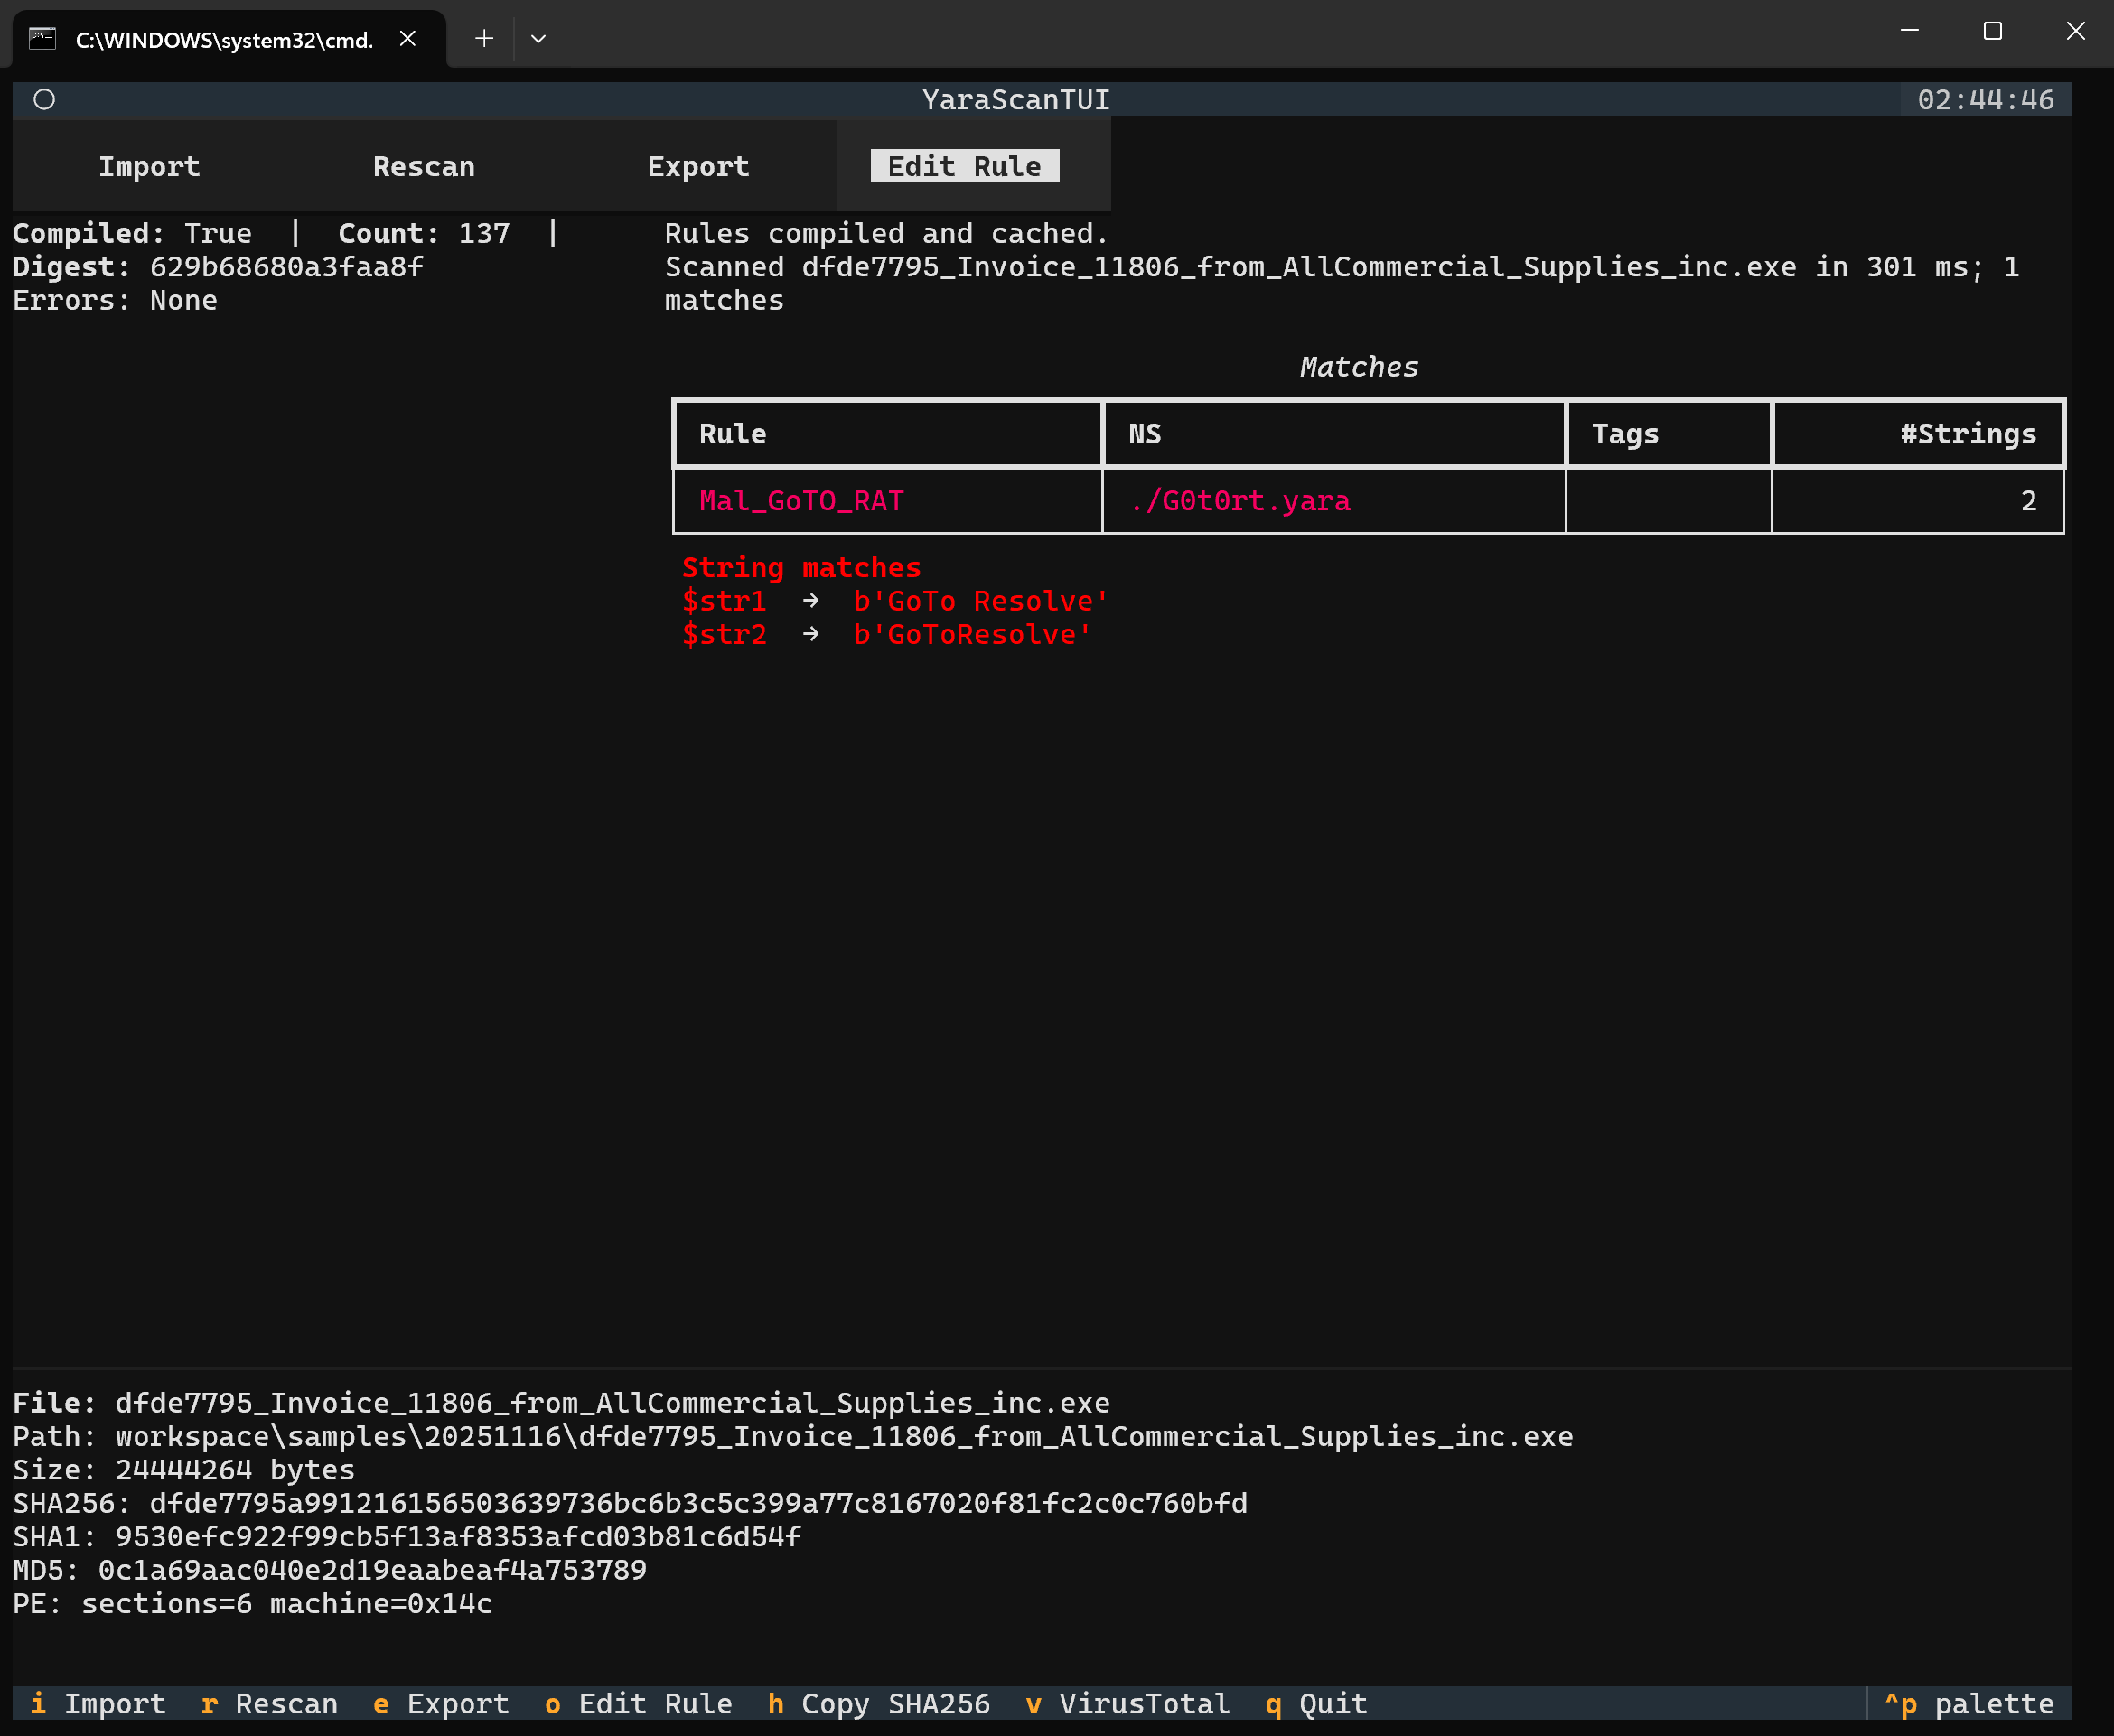
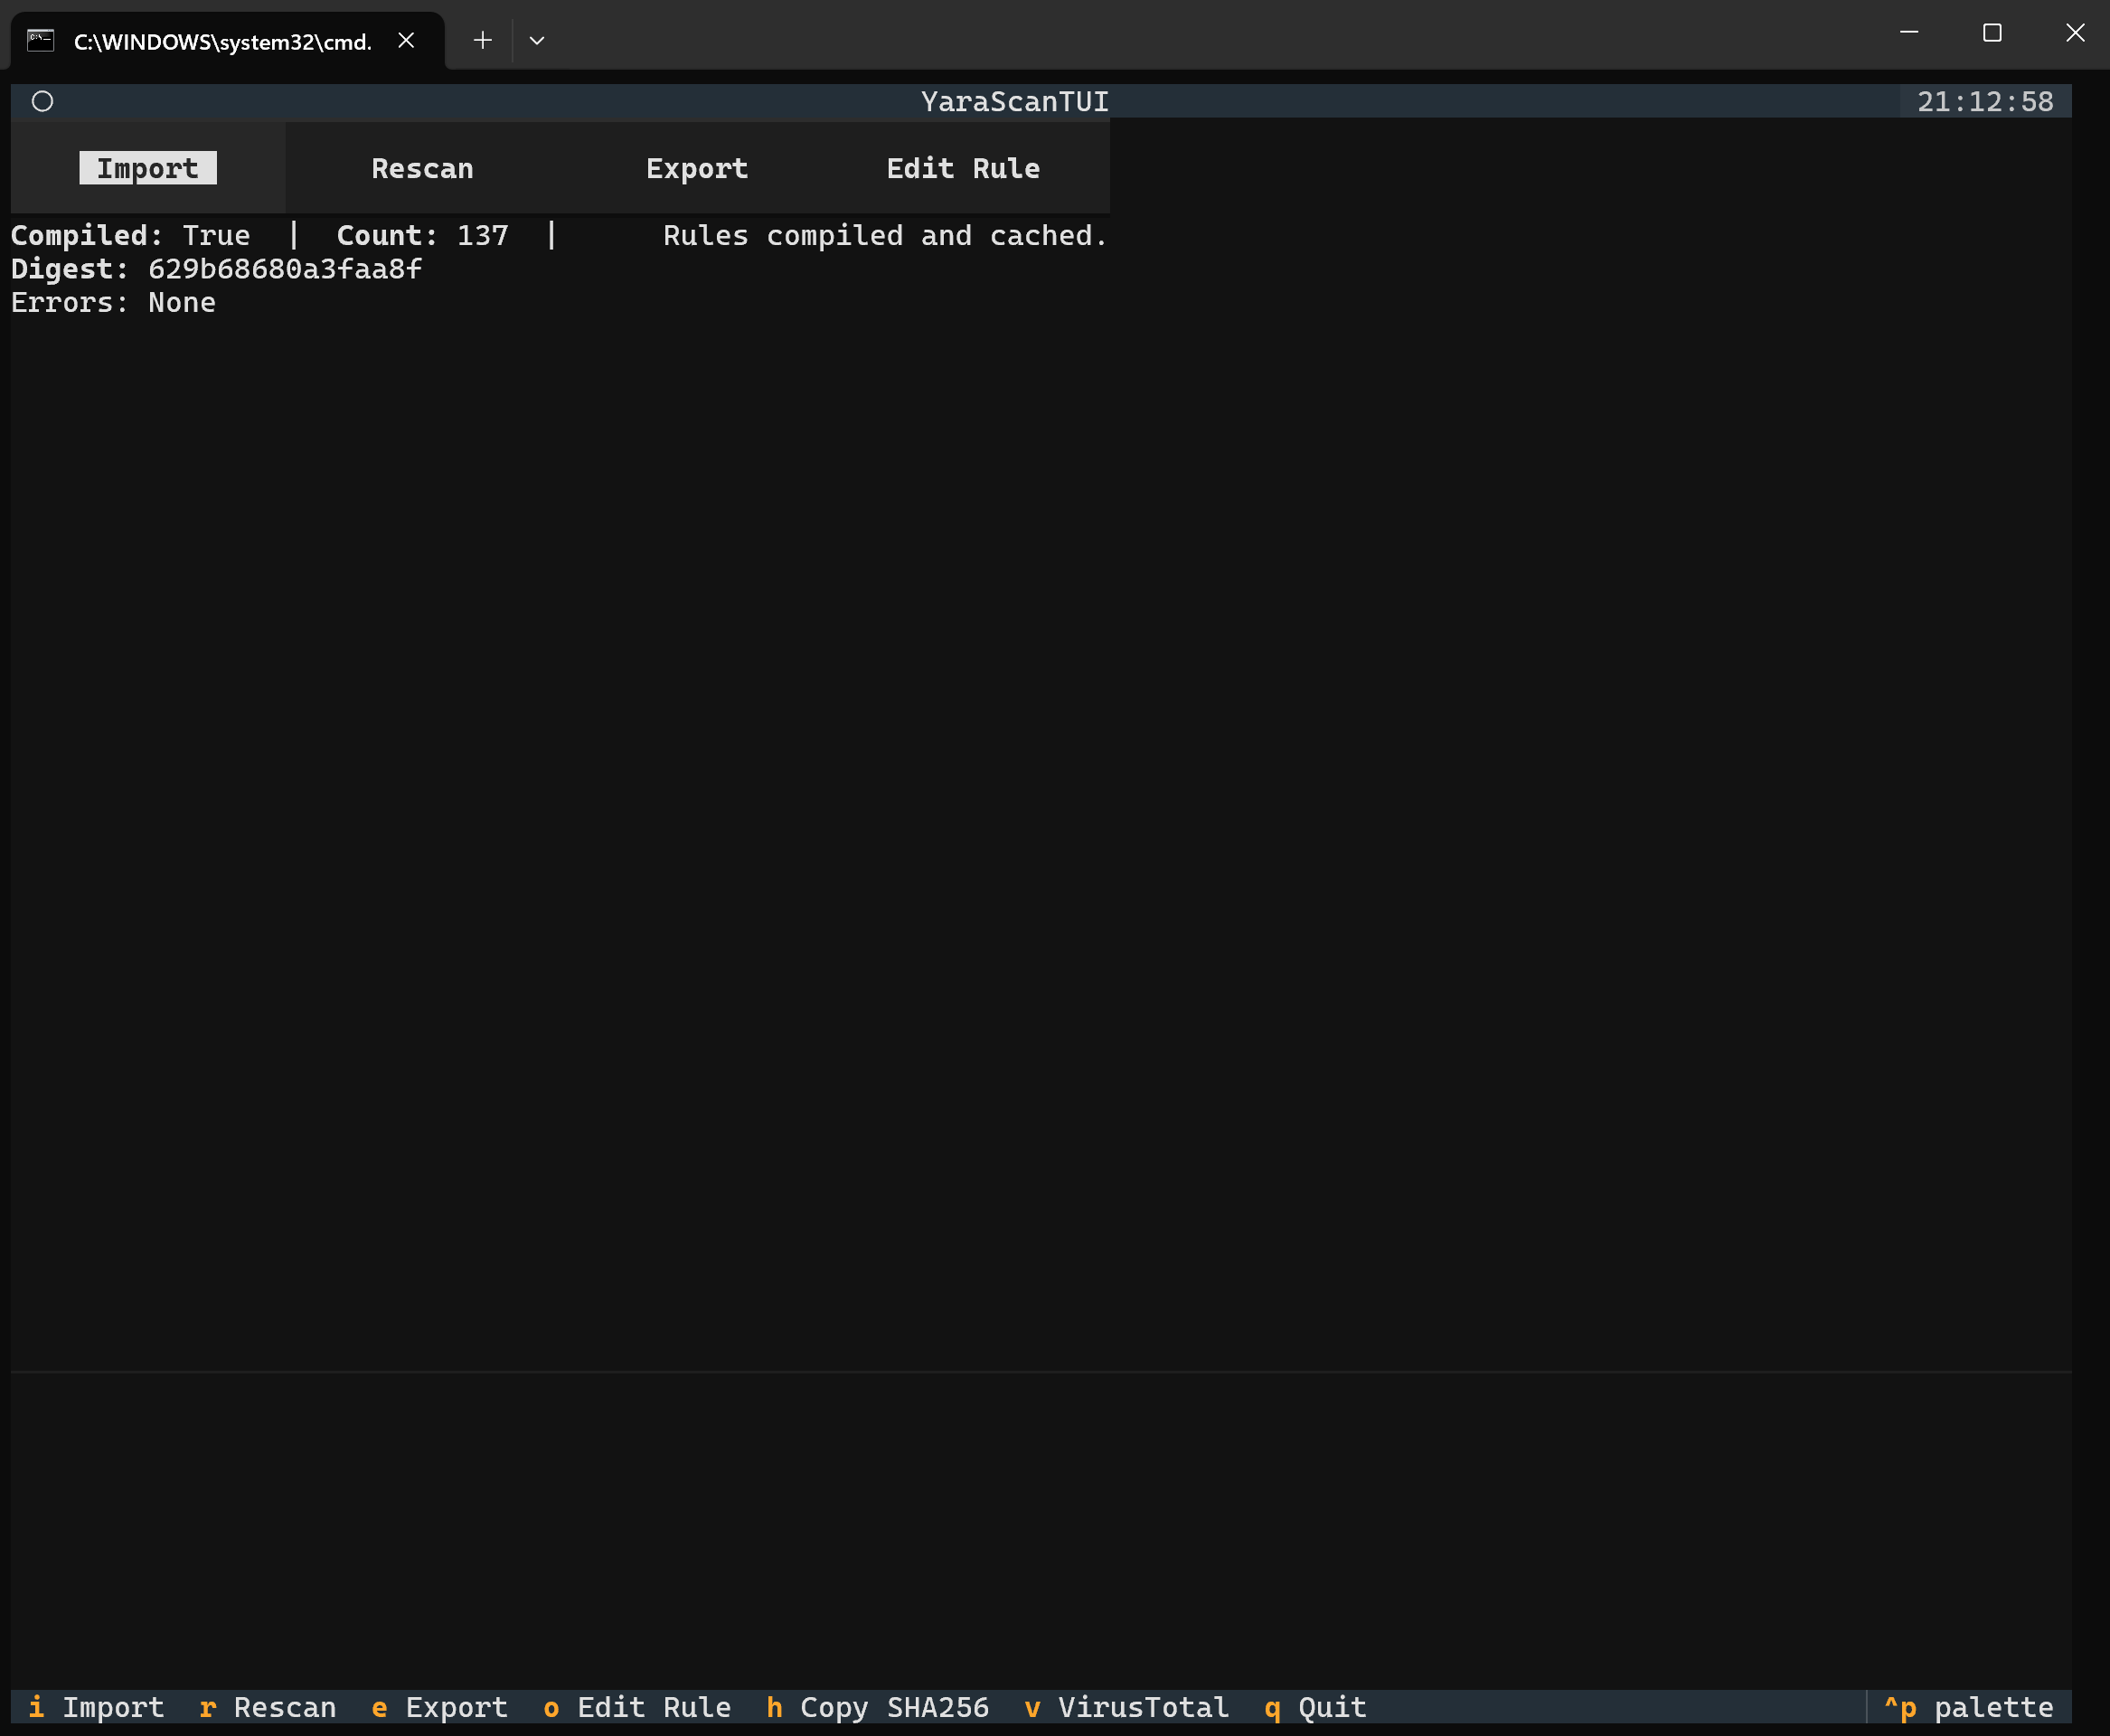
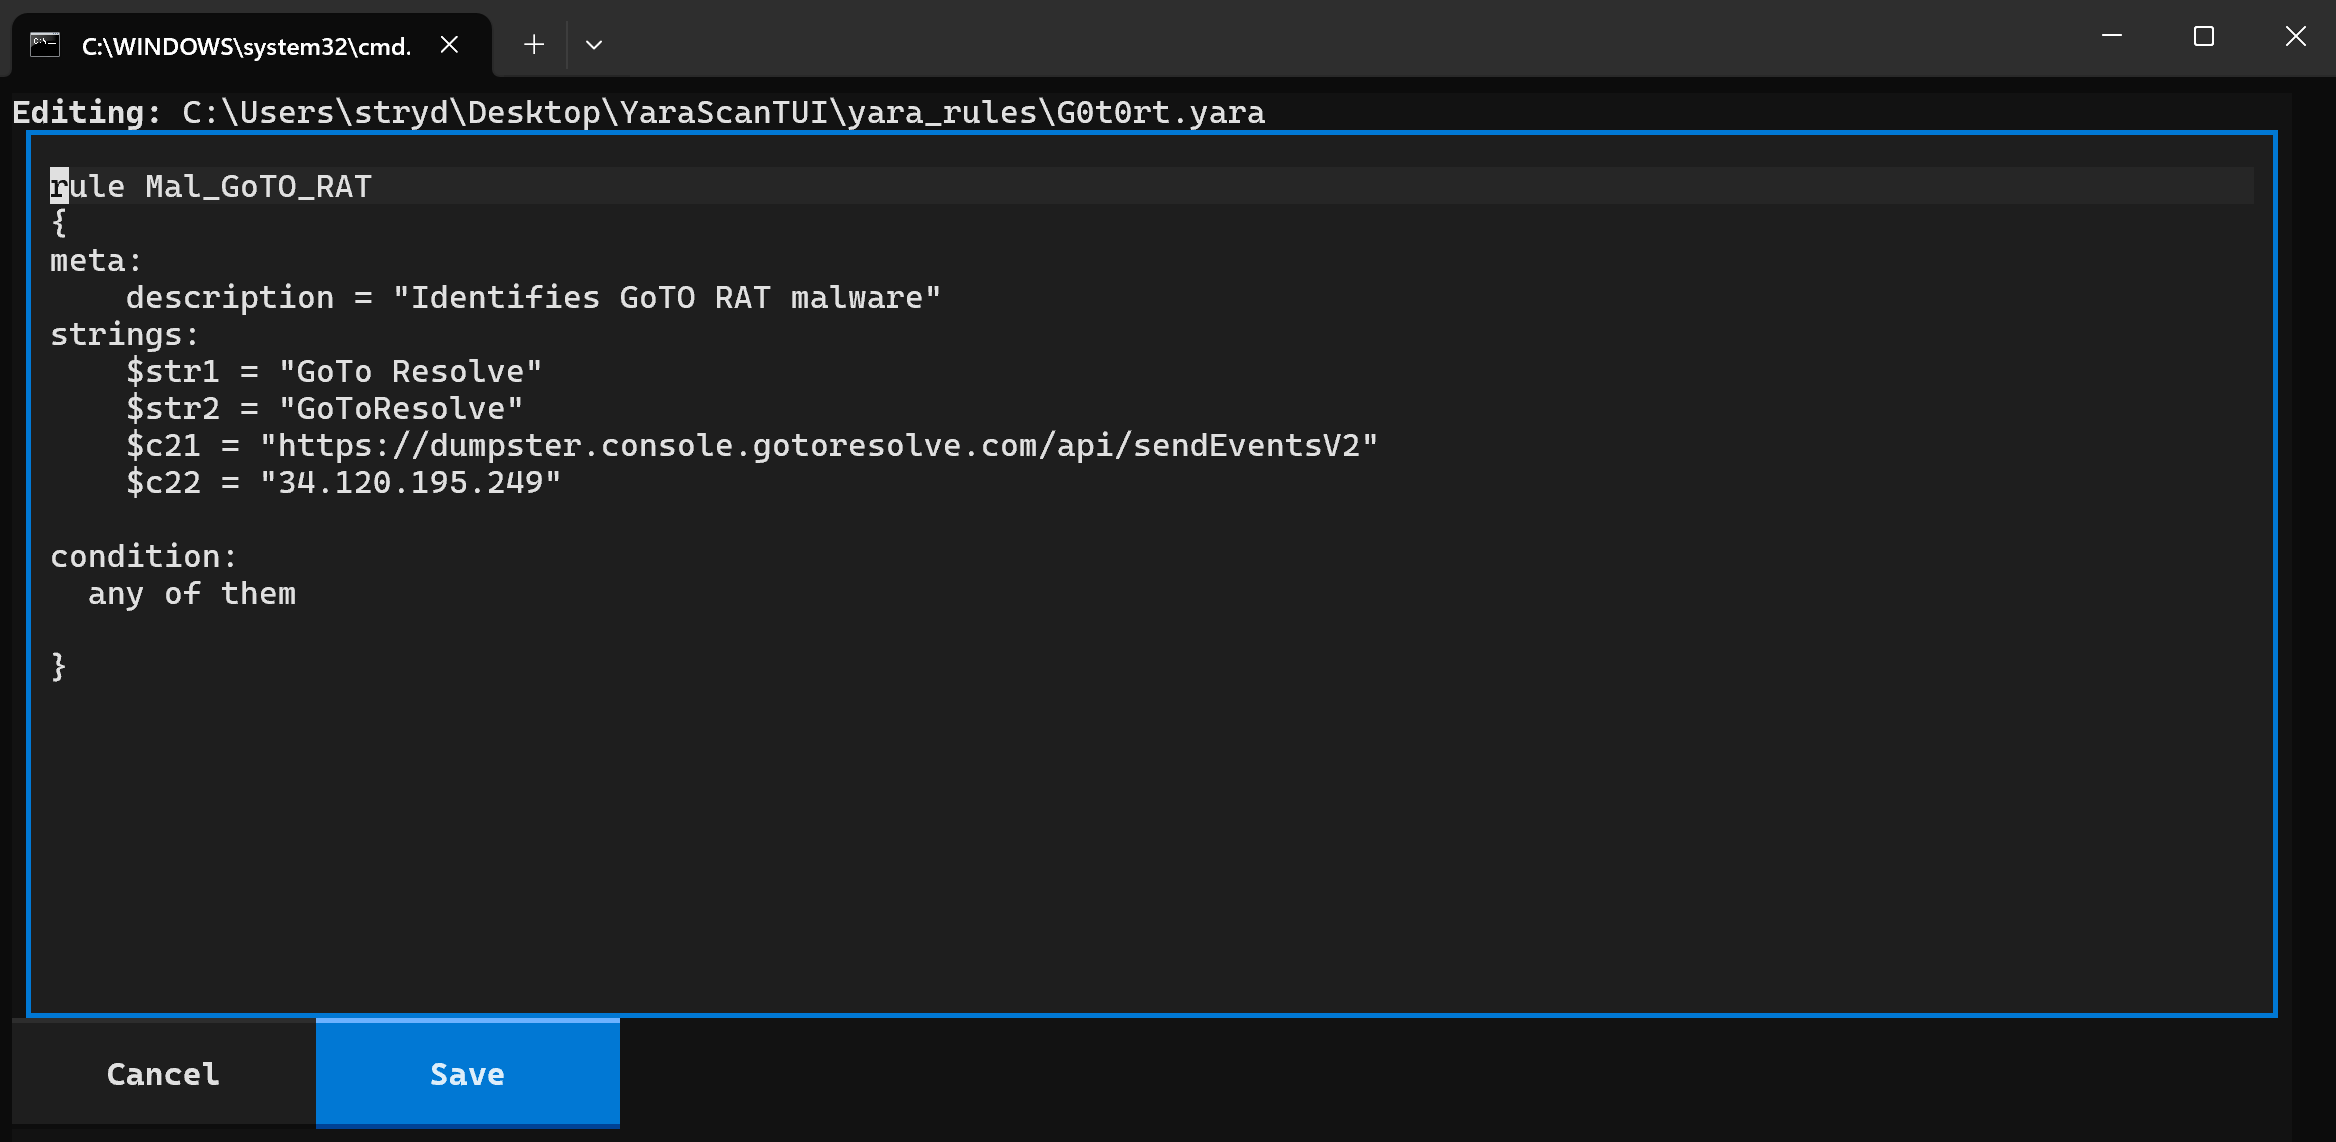
Rule editing within our TUI environment
Choose Edit Rule from top menu and select the rule from the drop-down.
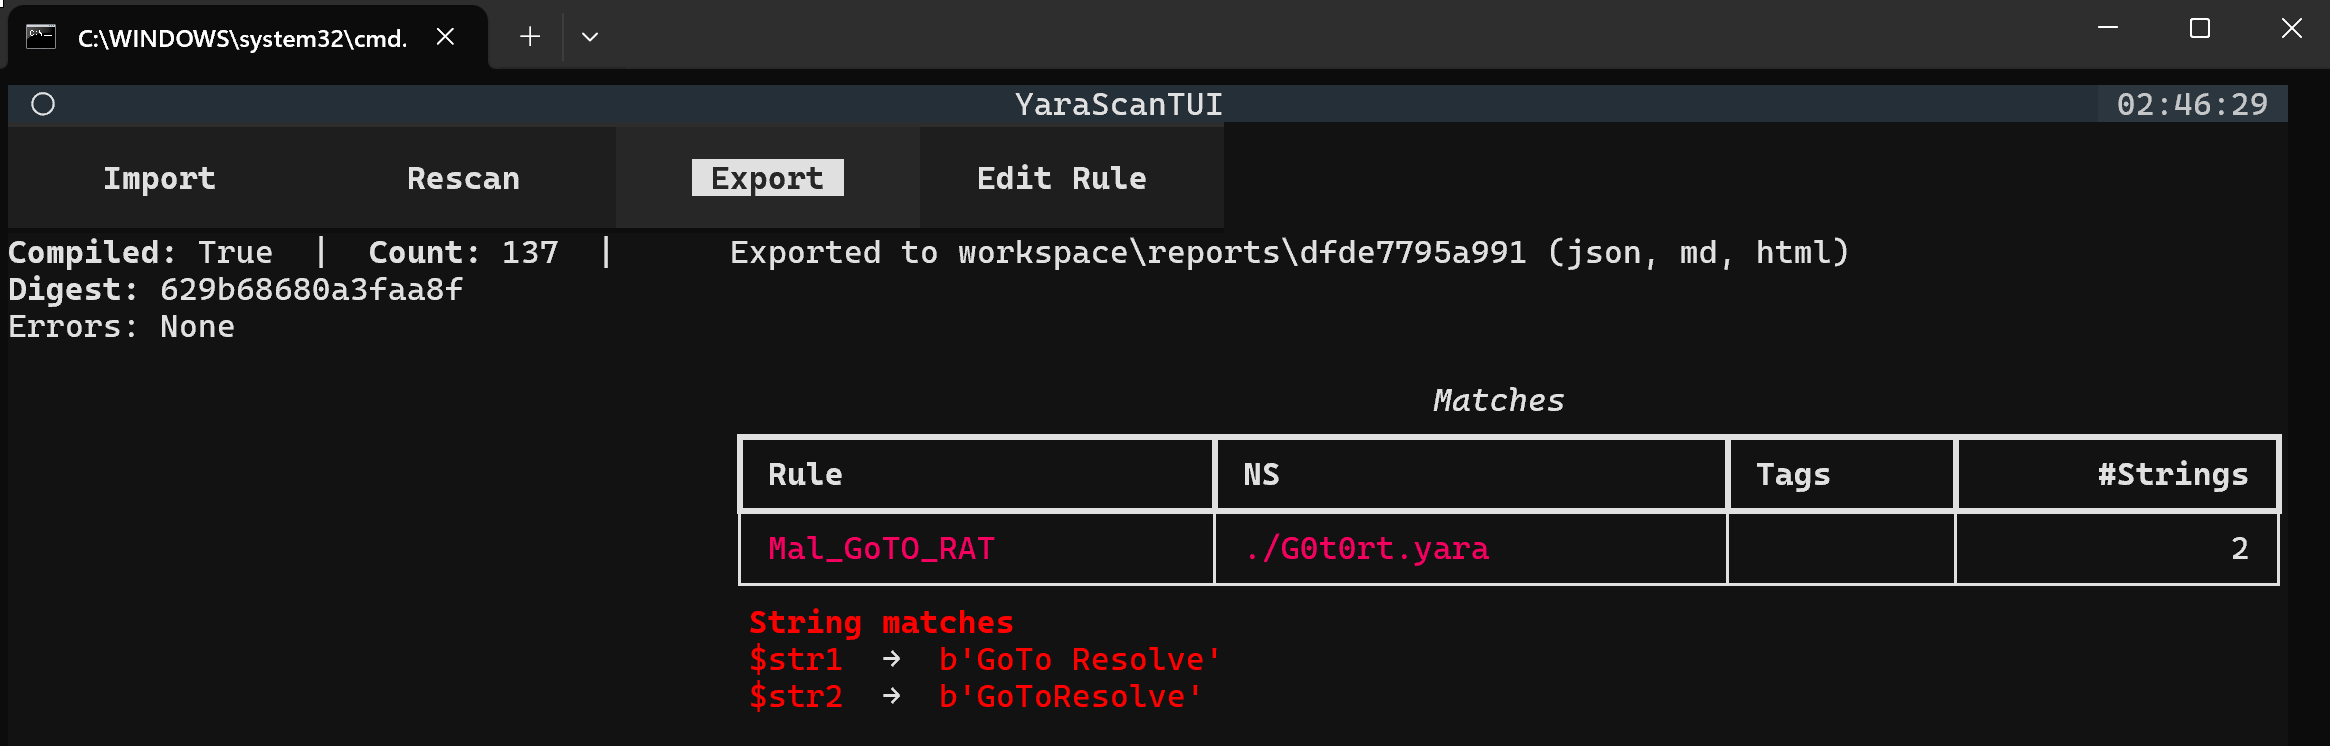
Scan report export
Choose Export from top menu; the tool will export a .json,
.md, and .html file of your matches.
7. Troubleshooting
“Python not found”
Install Python 3.10+ and ensure PATH is set. Use add-python-to-path.bat if needed.
Dependency install slow or stuck
Ensure internet on first run. Reset environment:
rm -rf .venv          # macOS/Linux
rmdir /S /Q .venv     # Windows
Then run the launcher again.
Rules not loading
- Ensure files go into yara_rules/, not
workspace/. - Ensure file extension is
.yaror.yara. - A syntax error in a rule can block compilation.
No matches for known malware
- Confirm correct sample path.
- Confirm the right rule is present in
yara_rules/. - Loosen rules temporarily to sanity-check detection.
8. Final notes
YaraScanTUI gives you a portable, repeatable, dead-simple YARA scanning workflow. As the ghostYara rule section on this site grows, you can keep pulling new rules into your local yara_rules/ folder and instantly use them against any sample set you’re analysing.