Implementing the ASD Essential Eight: Practical Hardening for Windows & Linux
The ASD Essential Eight is more than a checklist – it is a practical hardening baseline that can materially reduce the impact of real-world attacks. This guide walks through step-by-step implementation examples for each of the eight strategies across Windows and Linux. From application control and macro settings to MFA and automated backups, the focus is on controls you can actually deploy with minimal guesswork.

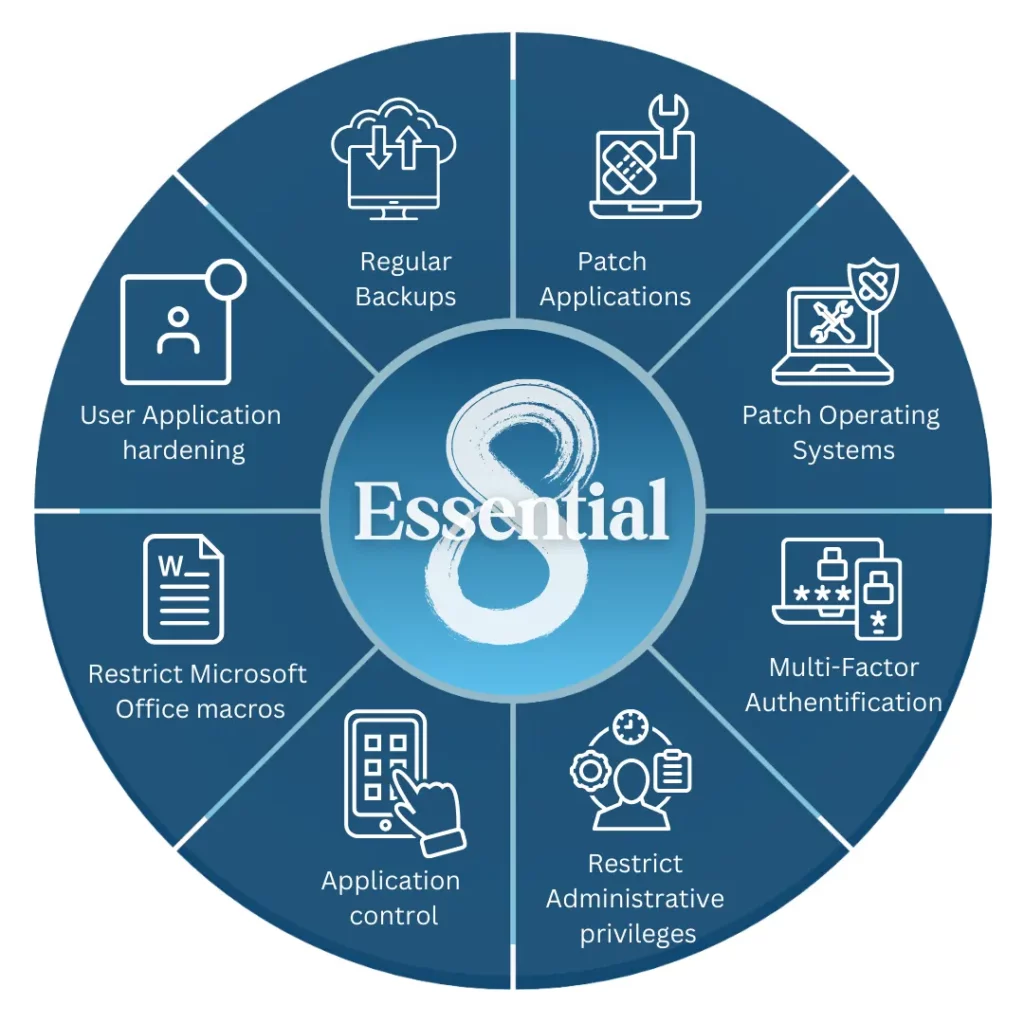
Implementing the ASD Essential Eight: Practical Hardening for Windows & Linux
The Australian Signals Directorate (ASD) Essential Eight has become the baseline security uplift for many Australian organisations. It is deliberately opinionated: it tells you not just what to do, but roughly how far to go.
The problem is that in most write-ups, the Essential Eight is described at a policy level:
“Do application whitelisting.”
“Patch your systems.”
“Enable MFA.”
Useful, but not enough to log into a host and actually implement the controls.
This post is a practical, step-by-step guide. It assumes a mixed environment with:
- Windows 10/11 endpoints
- Linux endpoints (e.g. Ubuntu)
- Microsoft 365 / Azure AD for identity and email (common in AU environments)
For each Essential Eight strategy, we walk through:
- What the control is trying to achieve
- Concrete implementation examples on Windows and/or Linux
Before you start: know what you are hardening
Before touching any keyboard:
- Inventory what you actually run
- Operating systems (Windows desktop/server, Linux flavours, macOS).
- Business-critical applications (browsers, Office suite, bespoke apps).
- Identity and access platforms (AD, Azure AD, Okta, local accounts).
- Understand who needs to do what
- Who genuinely needs admin rights.
- Who uses macros for legitimate reasons.
- Which systems are mission-critical if taken offline.
- Decide your target maturity
- Essential Eight maturity levels (0–3) define how far you go with each control.
- You may aim for higher maturity on internet-facing or critical systems first.
Once you have this context, you can start turning the Essential Eight into concrete configurations.
Application control: Whitelisting on Windows
Goal: Only allow trusted, approved applications to execute. Block unknown binaries and script-based payloads by default.
On modern Windows fleets, application control is often delivered through:
- Windows Defender Application Control (WDAC)
- AppLocker
- Third-party allowlisting tools
For smaller environments or standalone hosts, Software Restriction Policies (SRP) via Local Security Policy can still be a simple starting point.
Step 1 – Open Local Security Policy
- Press
Win + R. - Type
secpol.mscand press Enter. - In the left-hand pane, expand:
Security Settings → Software Restriction Policies.
If no policy exists, right-click Software Restriction Policies and select New Software Restriction Policies.
Step 2 – Flip the default model to “deny-by-default”
- In Software Restriction Policies, click Security Levels.
- Right-click Disallowed → Set as Default.
- Confirm that the default security level is now Disallowed, not Unrestricted.
This is the core shift: everything is blocked unless explicitly permitted.
Step 3 – Allow known-good locations
You now need to create explicit “allow” rules for trusted paths.
- Right-click Additional Rules.
- Choose New Path Rule….
- Add rules for locations such as:
C:\Windows\*C:\Program Files\*C:\Program Files (x86)\*
- Set the Security level to Unrestricted for these paths.
You can also add hash or certificate rules for specific binaries where path-based rules are too coarse.
Step 4 – Harden script execution
Script file types are a common initial access vector. You should ensure they are treated as “executable” so SRP controls them.
- In Software Restriction Policies, right-click Additional Rules and select Designated File Types.
- Confirm that high-risk extensions are listed (or add them if missing), including:
.ps1,.psm1(PowerShell scripts and modules).vbs,.vbe(VBScript).js,.jse(JScript).wsf(Windows Script File).bat,.cmd(batch files), where appropriate
- Remove filetypes that are safe to ignore if they cause noise (e.g. some shortcut types), but do so deliberately.
Test with a non-critical machine first: drop a .ps1 script into a non-whitelisted folder and confirm that it is blocked.
Patch applications: keeping software current on Linux
Goal: Ensure third-party and line-of-business applications are updated quickly when security patches are released.
On Linux, especially where you build or customise software from source, applying patches can mean:
- Using a package manager (apt, dnf, etc.) for standard packages.
- Applying source-level patches for custom code via
diffandpatch.
Step 1 – Use the package manager for standard software
On Debian/Ubuntu-based systems:
sudo apt-get update
sudo apt-get upgrade
# or, when appropriate:
sudo apt-get dist-upgrade
This should be automated via:
- Configuration management (Ansible, Puppet, etc.).
- Scheduled tasks (cron, systemd timers).
- Managed tooling (e.g. Landscape, Canonical Livepatch, or equivalents).
Step 2 – Apply source-level patches safely
For custom applications managed in-house, a common workflow uses diff and patch:
- Place the original file (e.g.
app.c) and the updated version (e.g.app_new.c) side by side. -
Generate a unified diff:
diff -u app.c app_new.c > app.patch -
Perform a dry-run to validate:
patch --dry-run < app.patch -
Back up the original file:
cp app.c app.c.bak -
Apply the patch:
patch < app.patch -
If needed, roll back:
patch -R < app.patch
This pattern generalises: always test, always back up, always confirm the outcome.
Macro security: hardening Microsoft Office
Goal: Stop malicious macros from executing while still allowing controlled, signed automation where needed.
Malicious macros remain a popular malware delivery mechanism. Your macro strategy should be:
- Block macros from the internet by default.
- Allow macros only from trusted locations or signed by trusted publishers.
Step 1 – Configure macro settings in Trust Center
From any Office application (e.g. Word):
- Go to
File → Options. - Select Trust Center.
- Click Trust Center Settings….
- Select Macro Settings on the left.
Recommended baseline:
- Choose Disable all macros except digitally signed macros.
- Optionally, also tick Trust access to the VBA project object model off unless required.
Step 2 – Use trusted locations and signed macros
To support legitimate automation:
- Create Trusted Locations in the Trust Center for authorised macro repositories (e.g. a signed network share).
- Sign internal macros with a trusted code-signing certificate.
- Educate users that:
- Macros outside trusted locations and unsigned macros will not run.
- Random macro-enabled files from email or the internet should never be enabled.
User application hardening: browsers and plugins
Goal: Reduce browser attack surface by disabling legacy plugins, controlling risky features, and adding protective extensions.
Browsers are often the first place users meet attacker-controlled content. You want to:
- Remove deprecated plugins (Flash, old Java plugins).
- Block unnecessary active content.
- Add protection against malvertising and tracking.
Step 1 – Confirm legacy plugins are disabled or removed
Modern browsers (Edge, Chrome, current Firefox versions):
- No longer support traditional NPAPI plugins such as Java.
- Have removed Adobe Flash entirely.
In managed environments:
- Use Group Policy (for Edge/Chrome) to prevent re-enabling any legacy plugin behaviour.
- Block access to sites that require legacy plugins and isolate those use-cases if absolutely unavoidable.
Step 2 – Harden browser configuration
For each browser standard:
- Disable “Allow sites to run insecure content” (mixed active content).
- Force HTTPS where possible.
- Block pop-ups and unwanted notifications.
- Restrict or block high-risk protocols/extensions not required by business.
In Edge/Chrome:
- Go to Settings → Privacy, search, and services.
- Enable protections such as:
- Tracking prevention.
- Secure DNS (DoH) with an approved resolver.
- Lock these settings via Group Policy where possible.
Step 3 – Use security-focused extensions
Deploy approved extensions such as:
- An ad blocker (e.g. uBlock Origin, Adblock Plus).
- A script control extension if appropriate.
- Enterprise password management tools.
These should be:
- Centrally managed and pushed (e.g. via Edge/Chrome extension policies).
- Reviewed periodically to ensure they remain trustworthy.
Restricting administrative privileges
Goal: Ensure users only have the rights they genuinely need, and that administrative access is separate, auditable, and limited.
Unnecessary admin rights turn small compromises into full-domain incidents.
Step 1 – Separate admin and user identities
On Windows:
- In Computer Management → Local Users and Groups → Users, create:
- A standard user account for daily use (if one does not already exist).
- A separate admin account for administrative tasks.
- Ensure the daily account is a member of Users, not Administrators.
- Place the admin account into an appropriate group (e.g. Administrators, or a delegated admin group in AD).
On Linux:
- Use named user accounts for normal work.
- Use
sudofor privileged actions, not directrootlogins. - Configure
/etc/sudoers(viavisudo) to limit what each admin can do, and log allsudoactions.
Step 2 – Apply least privilege to files and services
On Windows:
- Use NTFS permissions to limit access to sensitive folders.
- Apply Group Policy to:
- Deny logon locally/over RDP for non-admin accounts where appropriate.
- Restrict installation of device drivers and new software to admins.
On Linux:
- Use
chownandchmodto control file ownership and permissions. - Use systemd service unit permissions (e.g.
User=,Group=,ProtectSystem=) to sandbox services.
OS patching: Windows and Linux
Goal: Keep the operating system itself up to date with security patches to close known vulnerabilities.
Step 1 – Configure Windows Update
On standalone Windows hosts:
- Open Settings → Update & Security → Windows Update.
- Click Check for updates and apply available updates.
- Configure Active hours to minimise impact on users.
- Enable automatic updates unless a staged patching process requires more control.
In managed environments:
- Use WSUS, SCCM, or Intune to:
- Approve updates.
- Ring deployments (test → pilot → broad).
- Report on compliance.
Step 2 – Configure Linux OS updates
On Ubuntu:
- Via GUI: open Software Updater and apply updates.
-
Via CLI:
sudo apt-get update
sudo apt-get upgrade
For servers, consider:
- Unattended-upgrades for security updates.
- Centralised management and reporting tooling.
Tie both OS and application patching into a regular cadence:
- Security updates ASAP (hours to days).
- Feature updates on a scheduled cycle.
- Clear maintenance windows and communication to users.
Multi-factor authentication (MFA)
Goal: Ensure that a stolen password alone is not enough to compromise an account.
MFA is critical for:
- Remote access (VPN, RDP, SSH gateways).
- Email and collaboration (Microsoft 365, Google Workspace).
- Administrator accounts in particular.
Step 1 – Enable MFA for Microsoft 365 / Azure AD users
- Sign in to the Microsoft 365 admin center or Azure portal with appropriate admin rights.
- Navigate to Azure Active Directory → Users → Per-user MFA (or equivalent under Conditional Access).
- Enable MFA for:
- All users, or
- High-risk groups first (admins, remote workers), then expand.
Step 2 – Register authenticator app
From the user’s perspective:
- Install Microsoft Authenticator (or another approved app) on their mobile device.
- On a workstation, browse to
https://aka.ms/mfasetup. - Sign in with the corporate account.
- Scan the QR code presented in the browser using the Authenticator app.
- Confirm a test notification or code.
For VPNs and SSH access:
- Integrate MFA via:
- SAML/OIDC with your IdP, or
- Local MFA modules (e.g. PAM-based OTP) if IdP is not available.
Regular backups: Linux commands and scheduling
Goal: Ensure you can recover quickly from ransomware, accidental deletion, or major system failure.
Backups should be:
- Regular (aligned with business RPO/RTO).
- Tested (restores verified).
- Stored in a way that attackers cannot easily modify or delete them.
Step 1 – Create a basic backup with tar
For file-level backups on Linux:
tar -czf /backups/data-$(date +%F).tar.gz /srv/data
-ccreates an archive.-zcompresses with gzip.-fspecifies the output file.
Step 2 – Use cpio or dd when appropriate
-
cpiois useful when combined withfindfor more complex selections:find /srv/data -type f -print | cpio -ov > /backups/data.cpio -
ddis suitable for disk or partition imaging:sudo dd if=/dev/sda of=/backups/disk-$(date +%F).img bs=4M status=progress
These tools underpin many higher-level backup solutions.
Step 3 – Automate backups with cron
To run a backup script regularly:
-
Create a script, for example
/usr/local/bin/backup.sh:#!/bin/bash tar -czf /backups/data-$(date +%F-%H%M).tar.gz /srv/data -
Make it executable:
sudo chmod +x /usr/local/bin/backup.sh -
Add a cron entry:
crontab -eExample: run every night at 1am:
0 1 * * * /usr/local/bin/backup.sh -
Verify that cron is firing:
grep CRON /var/log/syslog
Remember: a backup strategy is incomplete without regular restore testing and secure offsite/immutable storage.
Bringing it all together
Implementing the ASD Essential Eight is not about perfection on day one. It is about:
- Knowing your environment.
- Picking realistic hardening steps.
- Implementing them consistently.
- Measuring and iterating.
In this guide, we walked through practical examples for each strategy:
- Application control using deny-by-default execution policies on Windows.
- Application and OS patching on both Windows and Linux.
- Macro lockdown and trusted locations in Microsoft Office.
- Browser and plugin hardening with modern configurations.
- Clear separation and restriction of administrative privileges.
- MFA rollout via Azure AD and authenticator apps.
- Regular, automated backups on Linux using
tar,cpio,ddand cron.
From here, the next steps are:
- Decide your target Essential Eight maturity per system class.
- Turn these examples into hardened baselines (GPOs, Ansible playbooks, Intune profiles, etc.).
- Embed monitoring and reporting so you know when controls drift.
The Essential Eight is most powerful when it stops being a PDF on someone’s desktop and becomes the default state of your fleet. This post gives you a starting point you can actually implement today.